
When you first move into a house you manage to do a number of fixes right off the bat. And then there those other projects that you delay for so long that you run out of steam and just learn to live with the problem. I've always wanted to retile the bathroom, but it's just too much money right now.
My house has a granny bathroom that I have disliked since day one. It is styled entirely from Home Depot, circa 1991. The shower is lined with 4x4 white tiles, set with a ¼ inch wide grout line in dark-gray. The tiles and grout are in very good shape and have stood up to years of use, so I was not eager to regrout or retile. It’s just really unattractive and feels unclean. A real estate friend thoughtfully paused at the walls, hand on chin, “Wow, there’s a lot of grout there.”
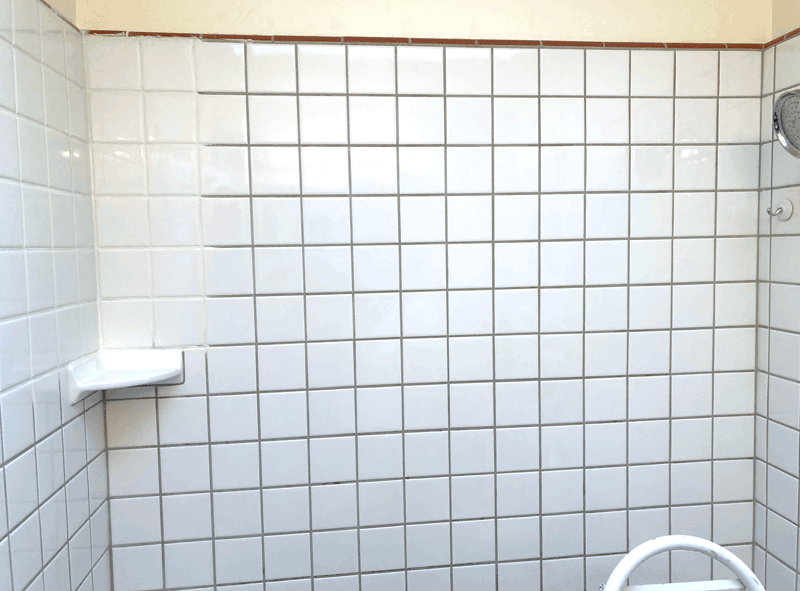
Before: the existing gray grout, and starting the first coat on the left

After: woo hoo! The difference is like night and day
I have recently gotten back into house fixing mode, and started scrolling through a number of home improvement blogs for inexpensive solutions. I landed on using a grout colorant and sealant like Mapei’s Grout Refresh. It feels and acts exactly like other water based acrylic paints. I’m going to walk through what worked and a few details that may help.
If you have never used this kind of product before, here are the basic steps.
- Clean the grout thoroughly, and let dry
- Paint on the Grout Refresh
- After an hour mist it with water
- Remove the excess with a white nylon pad
- Let dry for 24 hours before getting it wet
- Let it cure for another several weeks before scrubbing
Sounds simple enough. But the instructions breeze through the steps so fast it’s easy to think that this is a weekend project. It isn’t. It took me 6 days before I could use the shower again, which in the future I could whittle down to 3 or 4 days.
Preparing the grout
I had a little mold and some embedded rust stains from hard water. I tried using various cleaners. What didn’t work? Regular household shower cleaners, Goof Off, and grout brushes that were much too wide or long and ended up spraying liquid everywhere except where you need it. Unless you have stray grout outside the joints, you probably don’t need sulfamic haze remover like the bottle recommends.
TileLab’s Grout & Tile Cleaner and took care of 90% of the cleaning with almost no fumes, bringing the grout back to its original color and state. I found the Fuginator tile brush on Amazon, and it was fabulous for quickly cleaning the long lengths of grout with no spattering. Then I used Aqua Mix Deep Grout Clean, and a little Oxo Good Grips brush that finished off the stubborn bits brilliantly.
After scrubbing and rinsing every inch of the grout to be colored, I let it dry at least 3 hours. In retrospect I would leave it to dry overnight just make sure it’s completely dry around the faucets and fixtures.
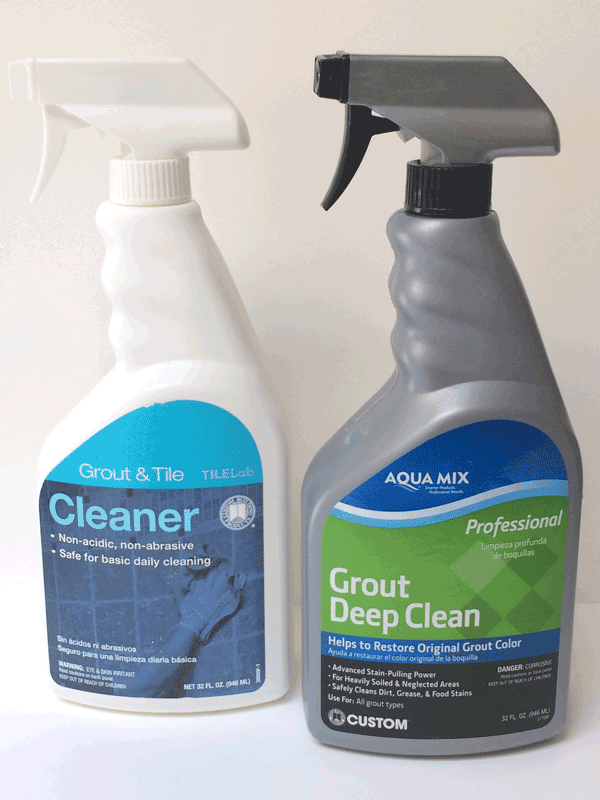
TileLab Grout & Tile Cleaner, Aqua Mix Deep Grout Clean

The Fuginator tile grout brush, Oxo brush

Mapei Avalanche, #2 round & 3/8" angled acrylic brush
Colors
My local Lowes caries a small selection of Mapei Grout Refresh colors, so I started with basic white (00). After the first layer, I stood back and realized that even with the show through of the original gray grout, White was just too warm.
I looked again at the full list of colors on the Mapei site, making some educated guesses about what colors to order. On the site, Avalanche looks like a light gray, but in fact is a cool bright white. Screen colors can never be completely accurate so you have to try them in person to determine the right color for your tiles.
I ordered Avalanche (38), Frost (77) and Silver (27) on Amazon. I got the additional grays in case I needed to mix my own colors. This is one step where I could have shaved two days off the project if I had this already in hand.
I ended up using Avalanche, which was a much cooler white and and matches my tiles more closely than White.

My final color choice - These four tiles with dots have second coat of Avalanche

Side by side showing White next to Avalanche
Painting
The first coat took about 3 hours to complete because I was taking my time working it into the crevices. The second coat only took around 2 hours because it spread so much more easily.
I worked methodically section-by-section, top to bottom, left to right. For each grout segment, I painted on the first layer, and immediately ran my gloved finger lightly over the grout line to push any excess out to the glazed tile. I went through several nitrile gloves as they got caked up, but this helped smooth the painted surface and minimize excess.
After painting and letting it sit for an hour, I sprayed everything with a fine mist of water. At first I used a white finishing pad to run over the surface. But I found it to be too harsh on the and took off some of the paint. It takes a delicate hand to only take off the excess that is on the tile and not disturb the first coat on the grout. Instead, I found that microfiber cleaning cloths worked well for getting most of it off and using the finishing pad only where needed.
Lessons learned
Mistake 1: Leaving the paint too long before taking off the excess.
After the first coat I left it for several hours. When I finally got around to wiping it off, it was really starting to set and it took some effort to remove the excess. Be sure to time your work so that you can remove the excess around 1 hour after painting.
Mistake 2: Not lining the tub, floor and walls with plastic before cleaning off the excess from the first coat.
When the Grout Refresh is soft, it splatters and gets absolutely everywhere. And then when it dries it adheres to the tub surface and chrome fixtures. I had to soak them in some cold water to soften it enough to scrape off. Before starting the second coat, I lined the tub with plastic, shaping it so any excess water could easily drain.
Careful! Plastic and wet surfaces slippery so take precautions to stay balanced and secure.

Line your surfaces for much easier clean up
Recap
- My goal was to change this grout color so that the eye isn’t drawn to it.
- I knew going in that I need two coats because I was dramatically lightening the color.
- I was prepared to use a different color half way through so the end result was brighter.
- The grout was in good shape without cracks or leaks. If this wasn’t the case, I suspect that regrouting or retiling would have been a better option.
- I have 68 square feet of tiled shower walls, with ¼ inch grout lines. 1 bottle of Grout Refresh completed two coats.
- Like all painting, preparation is everything. Carefully taping and covering the surfaces to protect them will go a long way.
Detailed steps
Before beginning test a small section for the right color.
Day 1
- Remove the shower curtain hardware, the shower curtain, towels and fabrics from the area.
- Clean the grout thoroughly and let dry.
Day 2
- Tape plastic sheeting over all of the surfaces you don’t want painted - walls, floor, and lining the tub so that any water can drain.
- Cover the faucets in tape to keep them clean.
- Paint on the Grout Refresh.
- Let it sit for an hour from when you finish painting.
- Have a well-deserved break.
- Spray with water to soften up the excess.
- Remove the excess with a white nylon pad, continuing to spray water as needed to keep it soft.
- Once it is dry, see if you need to paint another coat. You can paint now or pace yourself and continue the next day.
Day 3
- Paint and finish a second coat if needed.
- Admire your hard work.
Day 4
- Let dry for 24 hours before getting it wet. I left it for 48 hours for good measure.
- Clean up.
- Put all the hardware back and enjoy your luxurious “new” bathroom.
- Welcome the accolades of your loved ones.
Afterwards
- Let it cure for another several weeks before scrubbing.
Checklist of supplies
- Mapei Grout Refresh
- TileLab Grout & Tile Cleaner for basic cleaning
- Aqua Mix Deep Grout Clean for the stubborn bits (not to be confused with the Heavy Duty Tile & Grout Cleaner, which has much stronger fumes of ammonia)
- Fuginator tile brush or similar grout brush
- Oxo brush or similar heavy duty small brush
- A box of disposable gloves
- Plastic sheeting and tape to secure it
- Small craft paintbrushes for acrylic paint
- Paper bowls for the paint and paper cups for some water
- Spray bottle with a fine mist
- Microfiber cleaning cloths
- White finishing pads
- Step stools that keep you balanced and secure
- A steady supply of coffee, music and podcasts
Final note
I'm happy to name the brands that I have used and how well they worked for me. No, I don't get any money or consideration from these companies. I do this because I see that many bloggers are pretty cagey about what materials they actually used and I'd prefer to share this info so that you can have a good understanding of what might work for you.